I recently updated my laptop to Apple’s newest OS, El Capitan, and unfortunately
due to their new rootless feature, the setup I had working for web development
had been reset. For this reason, I thought I’d really quickly show how easy it
is to setup an Apple laptop to develop Symfony websites. This guide should also
work for previous versions of OSX as well.
Step 1: Enable Apache
Luckily Apple hasn’t decided (yet) to remove Apache from the operating system,
so getting a webserver setup is a doddle. Load up Terminal, and in the console
type the following:
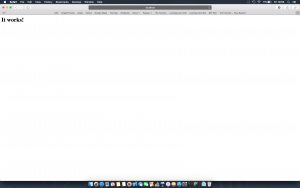
This should be enough to get your local webserver up and running! To check it
works, open up your fave web browser and go to “http://127.0.0.1”. Hopefully you
should see something like this:

Step 2: Enable PHP, alias and rewrite Apache modules
Next we need to enable a few Apache modules that we’ll need to run our website.
To do this, you’ll need to open up /etc/apache2/httpd.conf in your favourite
editor as root, and uncomment a few lines. In the example below I use nano
as it’s pretty simple to use, but vim is also a good option.
sudo nano /etc/apache2/httpd.conf
Find the following lines, and remove the prepended # to enable:
LoadModule alias_module libexec/apache2/mod_alias.so
LoadModule rewrite_module libexec/apache2/mod_rewrite.so
LoadModule php5_module libexec/apache2/libphp5.so

Include /private/etc/apache2/extra/httpd-vhosts.conf
You’ll then need to restart your Apache daemon with the following command:
Step 3: Create a Symfony application
Create yourself a new symfony application, following the instructions
here. I used the
symfony installer, so the following commands in Terminal should get you a new
symfony app setup:
sudo curl -LsS http://symfony.com/installer -o /usr/local/bin/symfony
sudo chmod a+x /usr/local/bin/symfony

symfony new my_new_project
You should now have a new folder called my_new_project with everything you need!
Step 4: Setup an Alias.
If you’re like me, you’ll probably want to develop more than one site at once,
and potentially have them located at different places on your hard drive. To do
this, I use Apache alias’ to forward requests to the correct sub-site. If you
followed the previous steps, you should now have the httpd-vhosts.conf file
being included in the Apache configuration. Open this file using sudo, and
replace with the following:
<VirtualHost *:80>
    DocumentRoot "/Library/WebServer/Documents"
    ServerName localhost

    Alias /my_new_project /path/to/my_new_project/web
    <Directory /path/to/my_new_project/web>
        Require all granted

        <IfModule mod_rewrite.c>
            RewriteEngine On
            RewriteBase /my_new_project

            RewriteCond %{ENV:REDIRECT_STATUS} ^$
            RewriteRule ^app\.php(/(.*)|$) %{CONTEXT_PREFIX}/$2 [R=301,L]

            RewriteCond %{REQUEST_FILENAME} -f
            RewriteRule .? - [L]

            RewriteCond %{REQUEST_URI}::$1 ^(/.+)(.+)::\2$
            RewriteRule ^(.*) - [E=BASE:%1]
            RewriteRule .? %{ENV:BASE}app.php [L]
        </IfModule>

    </Directory>

    ErrorLog "/private/var/log/apache2/localhost-error_log"
    CustomLog "/private/var/log/apache2/localhost-access_log" common
</VirtualHost>
You can obviously add more alias’ as you create more applications.
Step 5: Setting up PHP
If you now go to http://localhost/my_new_project you’ll probably see an error
message with something like this:
Warning: date_default_timezone_get(): It is not safe to rely on the system’s
timezone settings. You are required to use the date.timezone setting or the
date_default_timezone_set() function. In case you used any of those methods
and you are still getting this warning, you most likely misspelled the
timezone identifier. We selected the timezone ‘UTC’ for now, but please set
date.timezone to select your timezone.
To fix this, you need to create a php.ini, and then set the date.timezone
variable. There’s a default php.ini file in /etc/php.ini.default, so in
Terminal, run the following:
sudo cp /etc/php.ini.default /etc/php.ini
sudo nano /etc/php.ini
Next, search for the line with “date.timezone” and remove the semi-colon from
the start of the line, setting the variable to something like “Europe/London”.
date.timezone = Europe/London
Save the file and this should then fix the PHP errors. You should now have a
fully fledged Symfony application running!